Learn basic quilling shapes to create your own floral greeting card!
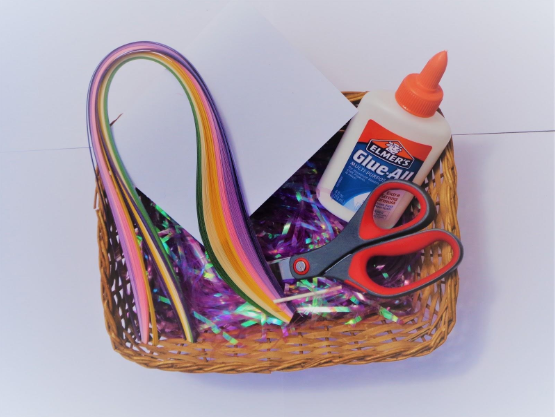
Materials
Instructions
- Begin by taking a sheet of white cardstock. Cut and fold it to the size you wish your greeting card to be.
- Next, take your first strip of paper. Choose a color you would like to use for a flower petal. The paper used in this tutorial is quilling paper 3mm in width. Each strip was folded and cut in half to be ~22 cm in length. You can experiment with different lengths and widths to see what works best for you.
- Carefully wind your strip around a toothpick, trying to keep the edges even.
- Then, slowly remove the strip, maintaining the coil you just created, but allowing the coil to expand a bit.
- Glue the end of the paper to the coil. You can make your coil bigger or smaller by teasing out the paper or pulling the end tighter. Hold the coil in place until the glue sets.
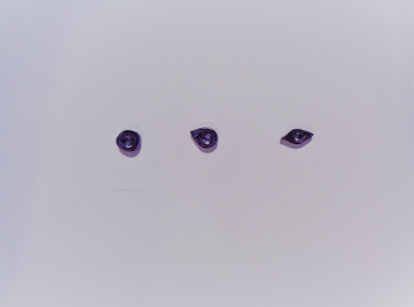
- The coil is the base of most of the shapes you will be creating when quilling paper. Create four or five more coils for your first flower.
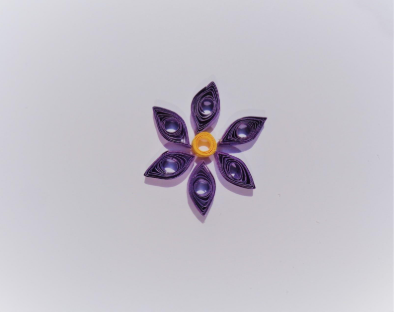
- Once you have five or six coils and the glue on each has dried, you can pinch the ends to make different types of flower petals. Pinch one end of the coil to make a teardrop. Pinch both ends at once to make a marquis.
- For the center of your flower, choose a yellow strip of paper. Cut it so its length is half of the length of the paper used for the petals.
- Wind the strip around the toothpick. Keep the coil tight when you remove it from the toothpick. Then glue the end of the paper to the coil.
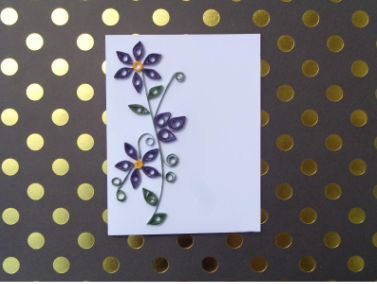
- Practice arranging your flower center and petals on your card where you would like them to be. When you are ready, apply glue to the edges and firmly press the edges onto your card until the glue has set.
- To create stems and leaves, you can practice making different types of scrolls. Wind one end around the toothpick, leaving the other end straight, to create a regular scroll. Wind both ends, leaving the middle straight, to create an “s” scroll.
- Make as many flowers, leaves, and stems as you want to create your perfect card!


