Do you have that drawer where all the buttons go? The buttons that never get pulled out….let’s make something out of them! Useful and fun! Easy for all ages!
Button Bowl
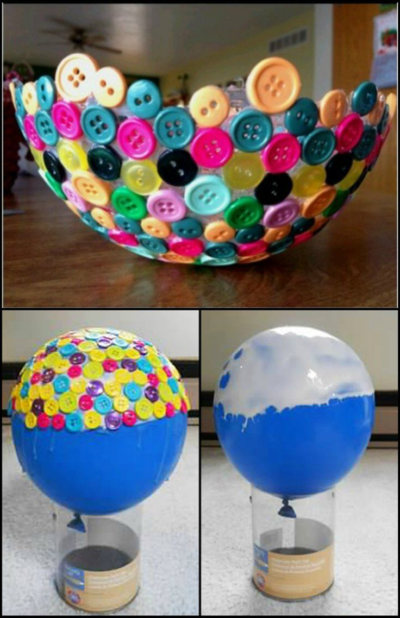
Create your own bowl using buttons and a balloon. It is super easy to make. Simply inflate the balloon, glue the buttons to it. Wait for the glue to completely dry and poke the balloon. That’s it!
You can adjust the arrangement of the buttons to make different shapes of bowls. Use it to hold some light objects such as candies, chocolates, accessories, tissues and so on. Or just decorate your table, as a gift…Enjoy !
What you will need:
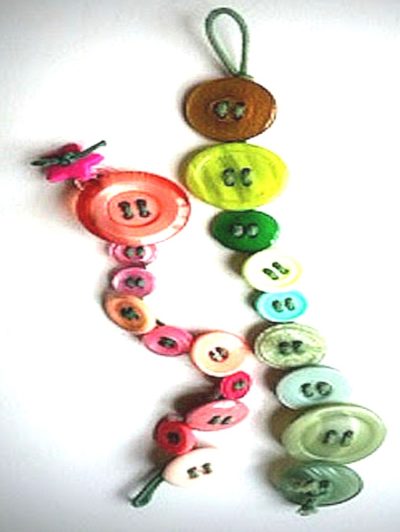
Button Bracelet – a Fun Way to Recycle Buttons
What you will need:
Before you start, choose the buttons you want to use. You should use all 4-holed buttons or 2-holed buttons. (2 holes will be easier for young crafters to use). You can use one 2H button for the end button of a 4H bracelet if you want to.
Try to pick a variety of sizes and textures and use colors that work well together.
Directions
Step 1: Choose your buttons and assemble them side by side near the ruler so you can see how many you will need for your bracelet. An average adult-size bracelet should be about 7-inches long (that takes about 10 – 12 buttons depending on the size of buttons you are using).
Step 2: Cut a piece of cord. You will need about 15 inches of cord for a bracelet made with 2-holed buttons (2H) or 30 inches if you are using 4-holed buttons (4H).
Step 3: Tie a loop for the clasp end. For 2H: Double about 2 inches at one end of the cord and tie a knot in it leaving a loop big enough to fit around the end button. For 4H: Double the ENTIRE cord and tie your loop so that the same amount of cord is on each side (you will thread one side of the cord through the top two holes of each button and the other side of the cord through the bottom two holes of each button)
Step 4: String the buttons on the cord so that the cord comes up from the back of each button and then goes back down from the top to the bottom of the button.
Step 5: Tie the last button onto the end of the cord. For 4H bracelets, bring both ends of the cord up from the back of the end button and then tie them together on top. For 2H, just run the cord through both ways and then tie it like you did the first loop (except the end button will be on the loop).
That’s it! You’re done! (I do put a little drop of Super Glue or clear nail polish on the knots so they won’t work themselves loose.)
Resources
CHECK OUT Creative Bug for other fun craft ideas for all ages!
Ways to upcycle everyday items? Check these out!
It’s a Family affair! Fun Crafting for Everyone!


