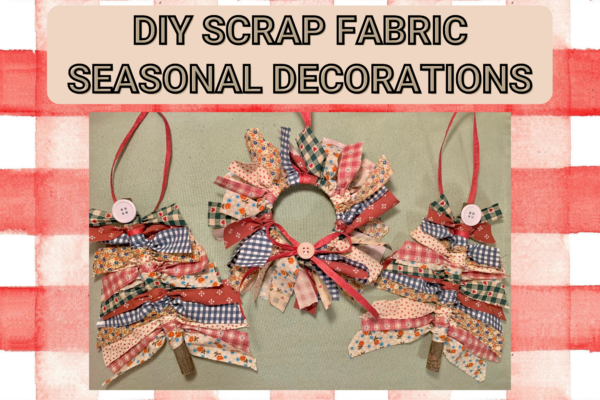
Winter is here, and what better way to mark the season than by making these beautiful, festive crafts! You can keep these scrap fabric decorations for yourself, or give them as a gift.
Let yourself get creative…if you don’t have scrap fabric, there are alternatives. Here, I will teach you how to make two adorable crafts which are perfect for the season.
DIY Scrap Fabric Tree Seasonal Decoration
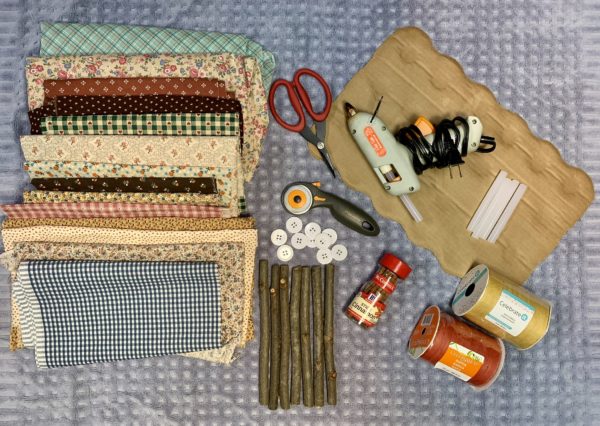
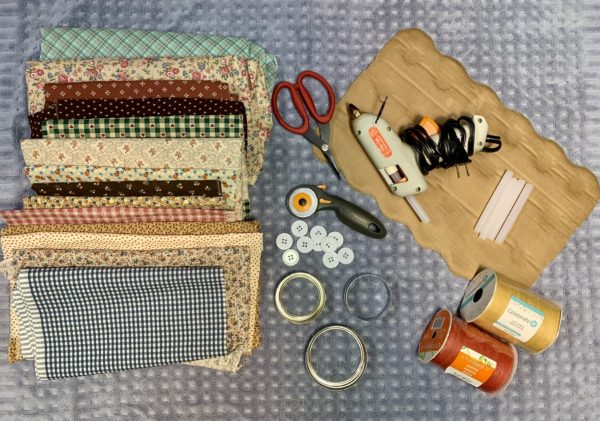
Supplies
Directions
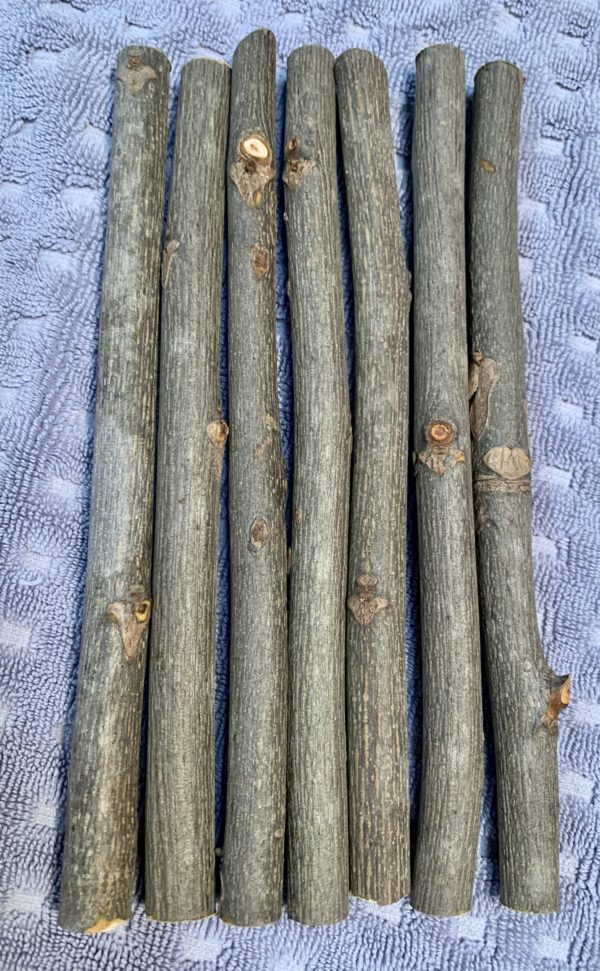
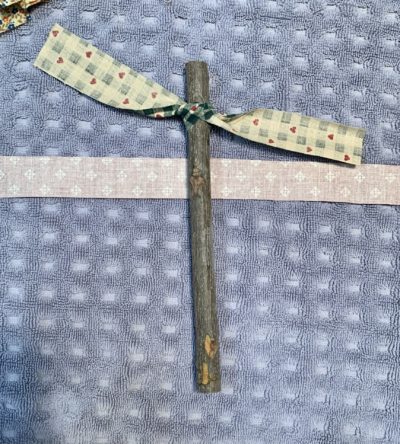
Make sure to preheat your glue gun about 10-15 minutes before you plan to use it, and rest it on a sturdy piece of cardboard (so the hot glue has somewhere to go when it starts to drip out of the gun). I went outside into my backyard and used pruning shears to cut some small tree branches and then cut them down further to 8’’ in length. If you don’t want to cut your own branches, you can purchase craft branches from an online store, such as Amazon.
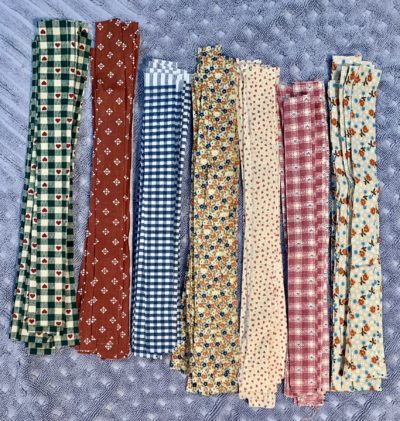
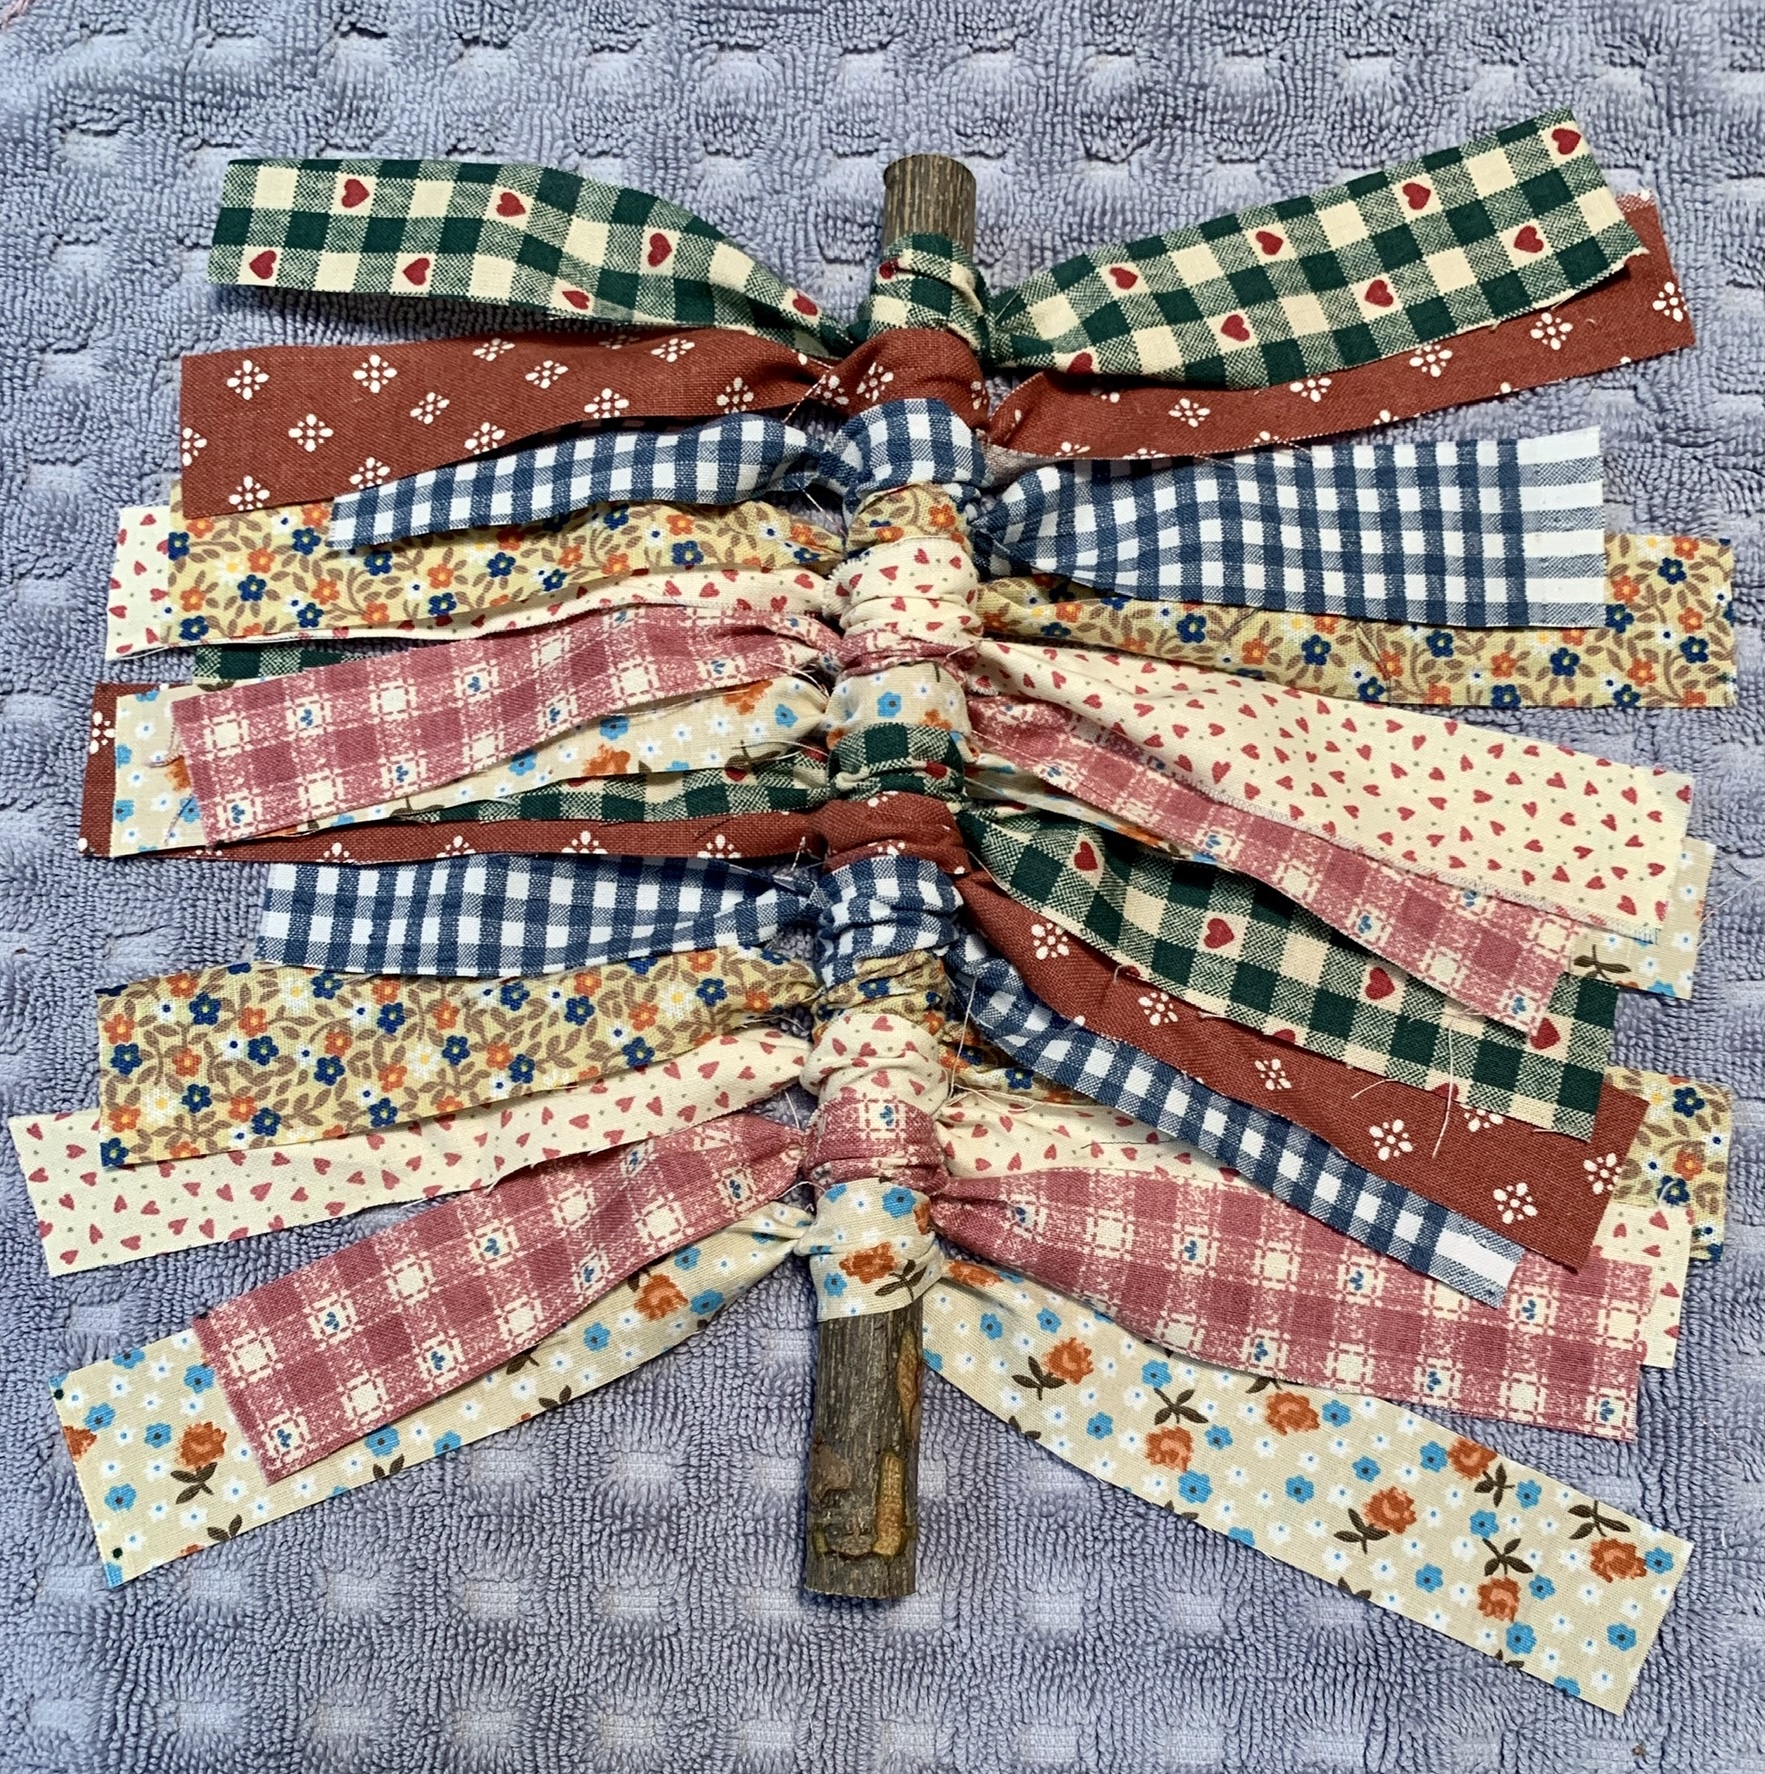
Look through your scrap fabric and choose your desired patterns (I chose 7 patterns that I liked), and use either a pair of scissors or a rotary cutter to cut the fabric into strips about 1’’ wide by 12’’ long.
Starting from the top of the stick, tie the strips of fabric over the stick with a square knot, but don’t pull it too tight until the very end. Leave everything loose so you can readjust the fabric if necessary, and move it around the stick.
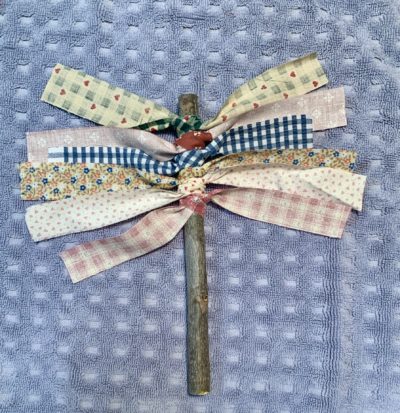
If your fabric is not double sided, as with homespun, and there is a plain undecorated backing to the fabric, play around with it after you tie the knot. You may need to adjust it until both front and back sides of the fabric are facing in their own direction.
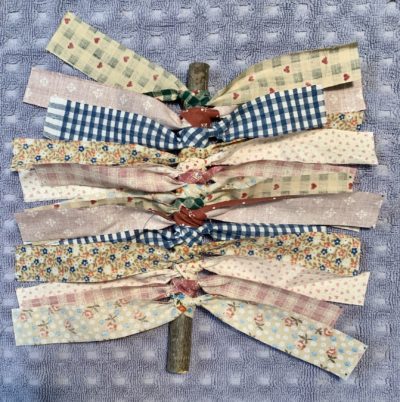
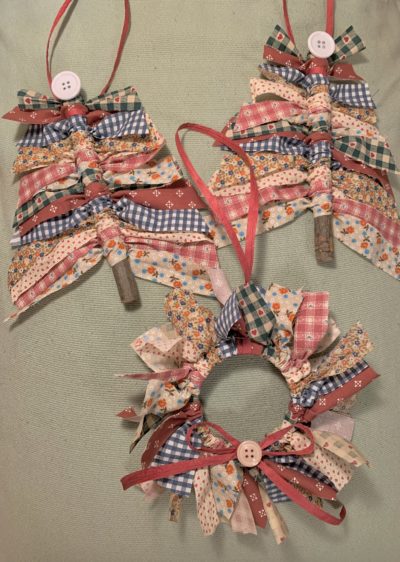
Because my stick is 8’’ long, I was able to use 14 strips of 1” wide knotted fabric on my stick. Once all the knots are tied, scrunch the strips together to leave room for the “star” (button) at the top of your tree decoration, and leave enough room for the trunk to show at the bottom. Also, now is the time to pull each knot tight, and reinforce it, with a square knot.
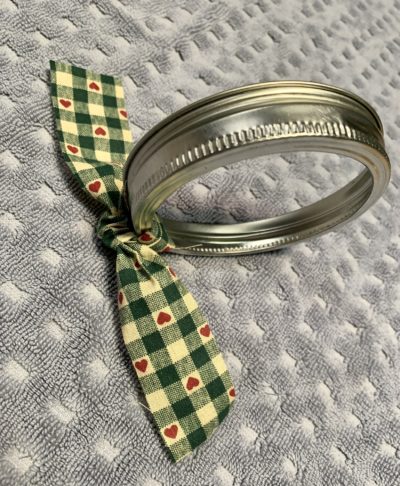
Back and front view of the square knots.
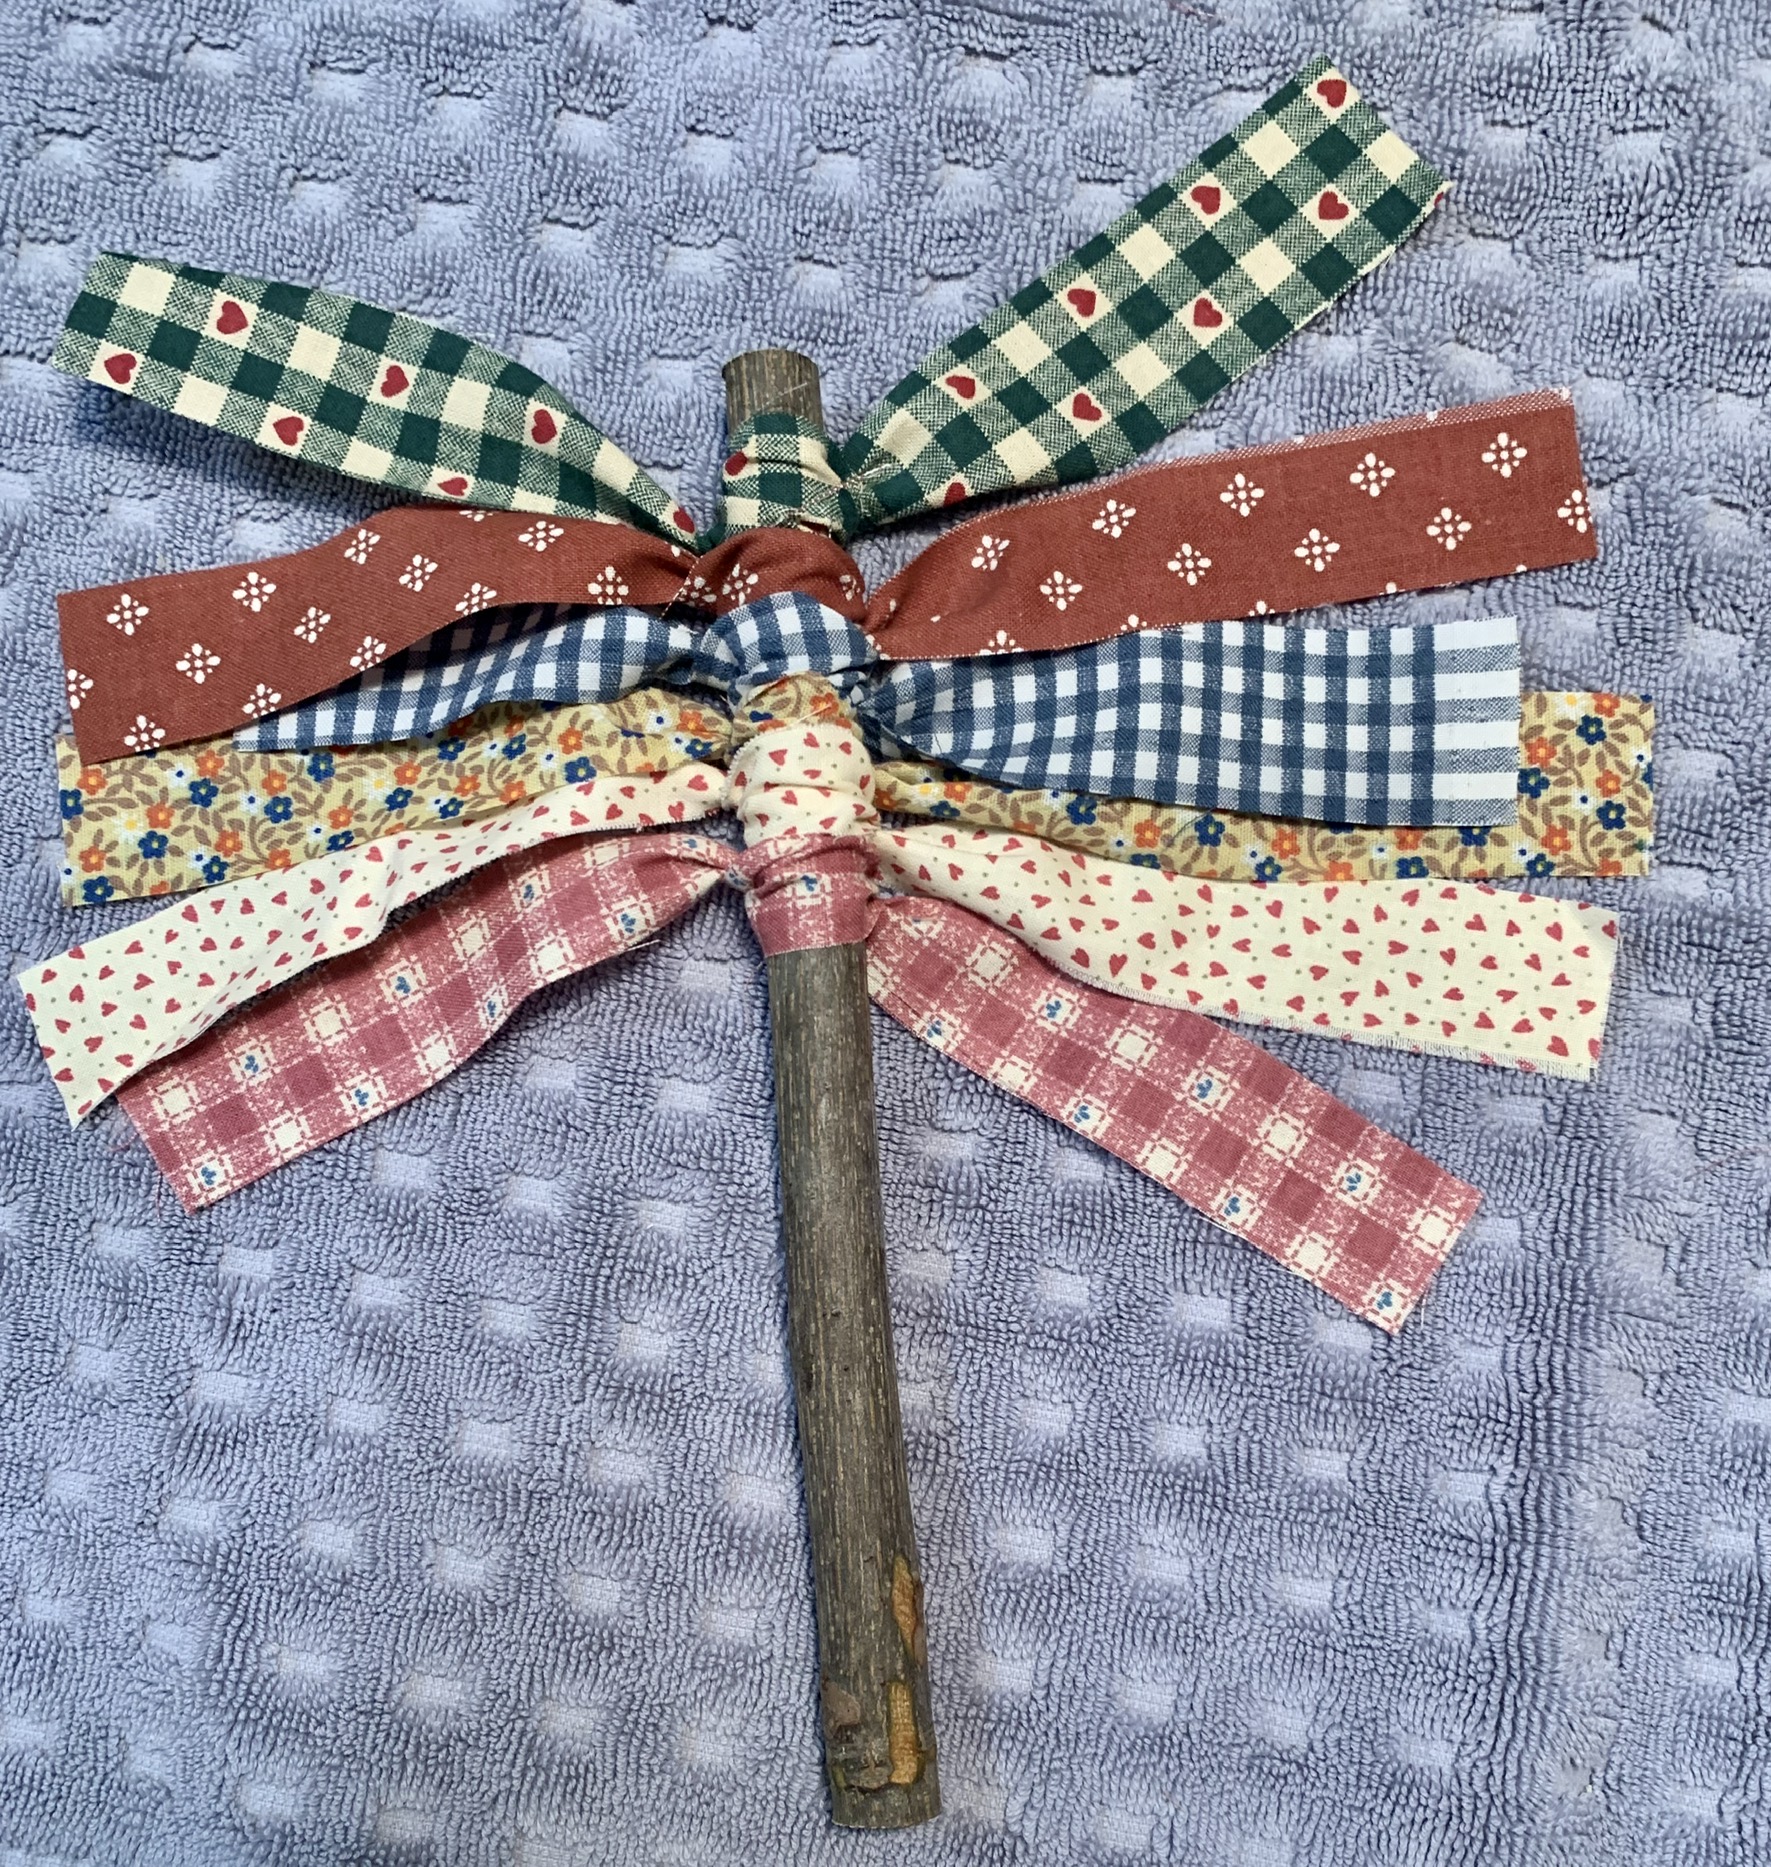
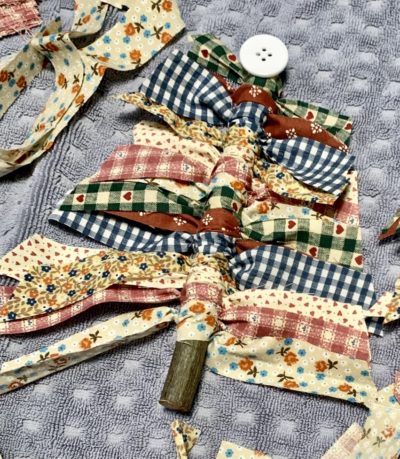
Once again, use either your scissors or the rotary cutter to cut the fabric strips into a triangular shape of a tree, wider at the base and more narrow at the top.
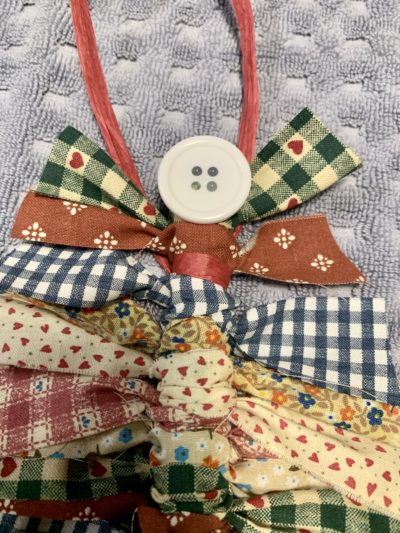
Use the hot glue gun to glue a yellow or white button to the very top of your tree decoration. I placed a dab of hot glue on a button, positioned it at the top of the branch, and held it in place for about 5-10 seconds to allow it to adhere. Lastly, glue a loop of twine or raffia to the back of your tree, so it can be hung and displayed.
DIY Scrap Fabric Wreath Seasonal Decoration
Supplies
Directions
Make sure to preheat your glue gun about 10-15 minutes before you plan to use it, and rest it on a sturdy piece of cardboard (so the hot glue has somewhere to go, when it starts to drip out of the gun). Look through your scrap fabric and choose your desired patterns (I chose 7 patterns that I liked) and use either a pair of scissors or a rotary cutter to cut fabric into strips about 1’’ wide by 12’’ long.
Tie the strips of fabric around the ring of the Mason jar lid with a square double-knot, but don’t pull it too tight until the very end. Leave everything loose so you can readjust the fabric, if necessary, and move it around the ring. If your fabric is not double sided, as with homespun, and there is a plain undecorated backing to the fabric, play around with it after you tie the knot. You may need to adjust it until both front and back sides of the fabric are facing in their own direction.
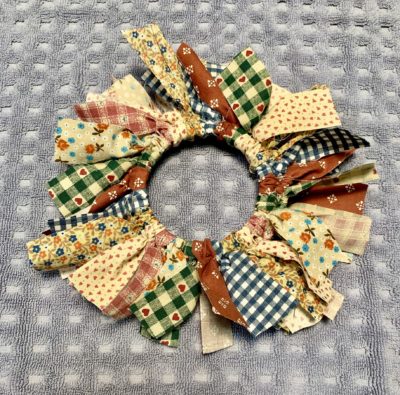
Once the entire Mason ring is covered in fabric and all the knots are tied, scrunch them together around the ring and tighten each knot, which will reinforce it. The amount of fabric and knots you’re able to fit is dependent upon the size of the Mason jar ring (or circular cookie cutter) you choose to use. I used a wide mouth Mason jar ring, and was able to fit 26 knots around the ring.
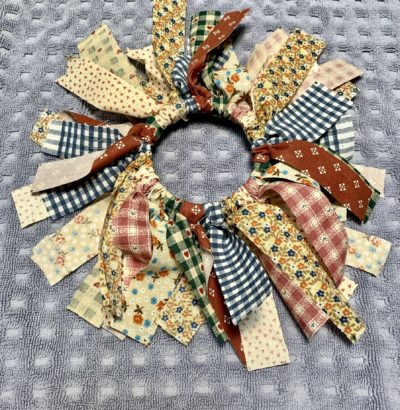
Once tied, the strips of fabric were about 3’’ long, so I cut them down to about 1½ ‘’ in length (so they were all uniform) and resembled a wreath.
I made a decorative bow using the raffia and used the hot glue gun to glue it to the bottom front of the wreath (I held it in place for about 5-10 seconds to allow it to adhere). Next, I glued a small button (which is the “star”) in the center of the decorative bow, by placing a dab of hot glue on the button, positioning it over the center of the decorative bow, and once again held it in place for about 5-10 seconds to allow it to adhere.
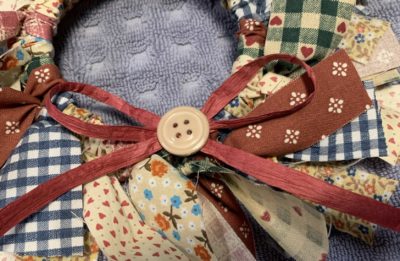
Lastly, I used a length of raffia to make a circle about 3’’ wide (to make a hanger) and looped it around the ring, knotting it and securing it with the hot glue gun. Now, all of the decorations are ready to be hung and displayed.
(My loyal craft assistants)

Additional ideas for seasonal crafts:
For more inspiring crafting ideas, please visit CCPL’s newest free crafting database, Creativebug.
You can also check out our CCPL catalog for more information on holiday crafts and sewing projects such as:
- Wild + Free Holidays: 35 Festive Family Activities to Make the Season Bright by Ainsley Arment
- Taste of Home Handmade Christmas by Reader’s Digest Magazine
- Christmas at Home: Holiday Decorating, Crafts, Recipes by Country Living Magazine
- Half Yard Christmas: Easy Sewing Projects Using Left-Over Pieces of Fabric by Debbie Shore
- The Spoonflower Quick-Sew Project Book: 34 DIY’s to Make the Most of Your Fabric Stash by Anda Corrie
- Fat Quarter One-Piece Projects: 25 Projects to Make from Short Lengths of Fabric by Tina Barrett
- Oh, Scrap!: Fabulous Quilts That Make The Most of Your Stash by Lissa Alexander
- Half Yard Gifts: Easy Sewing Projects Using Left-Over Pieces of Fabric by Debbie Shore
Below are links to the websites that inspired both of these craft projects:
NOTE: If you don’t have scraps of fabric and would prefer to use assorted ribbons, here is a variation of the tree decoration:
- DIY Tree Seasonal Decoration (using ribbons cut into 12’’ strips)
Image credits:
Unless otherwise noted and linked, all images were shot during the making of this blog.


