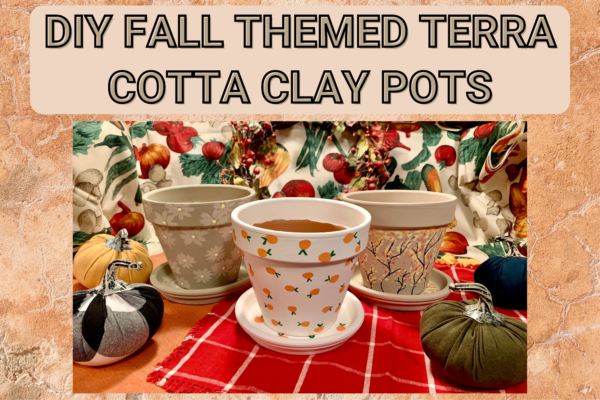
As the weather turns cooler, and summer planting season comes to an end, why not bring the garden fun indoors with a fall themed garden craft? You can keep these painted clay pots for yourself and decorate your kitchen and dining room table, or give them as a gift.
Let yourself get creative, you don’t have to paint exactly what I made…you can design your pot as Halloween-themed, floral-themed, Fall-themed, or something that might appeal to children.
Materials
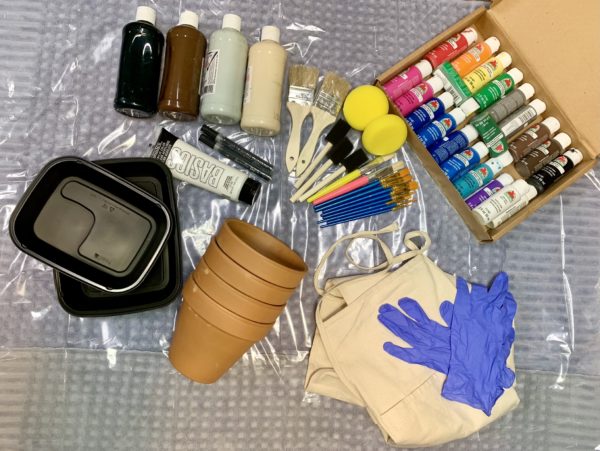
Directions
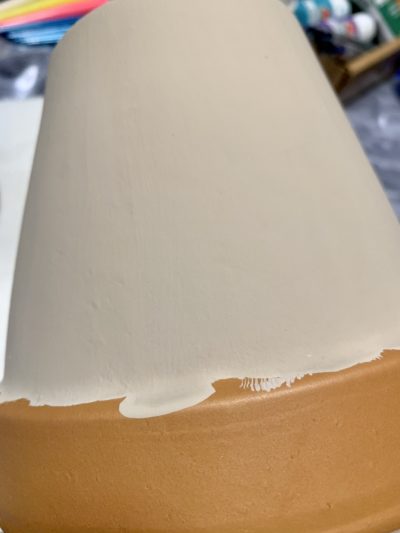
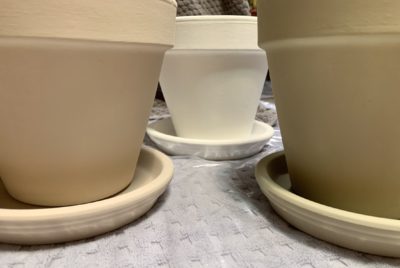
Begin by choosing paint colors to serve as the base (I chose neutral autumnal colors and decided to paint two of my clay pots white, another clay pot sage green, and the fourth clay pot taupe). Apply a few thick, even layers of paint to your pots and try to paint in the same direction, so there are no streak marks. I also painted the corresponding saucers to match. Let them dry thoroughly in between coats (I let my pots and saucers sit for about an hour, before proceeding with the more intricate designs).
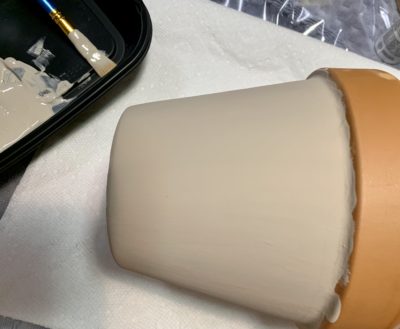
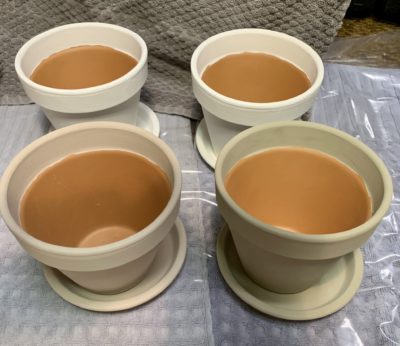
My base colors, prior to the designs.
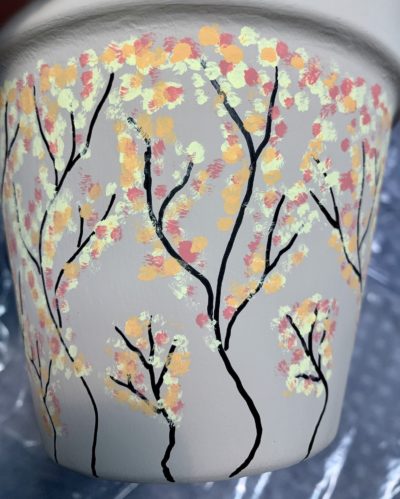
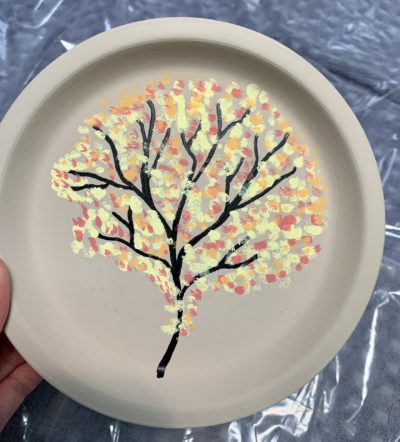
Next, I began work on my taupe clay pot and saucer. I decided to use my acrylic paint pen to draw abstract designs all over the pot (to mimic fall trees and branches), and I repeated this design on the saucer. The acrylic paint pen took about a half hour to dry.
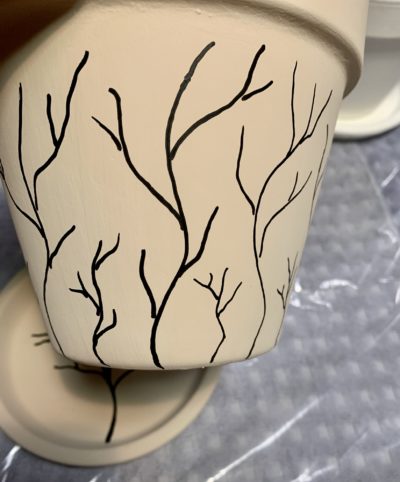
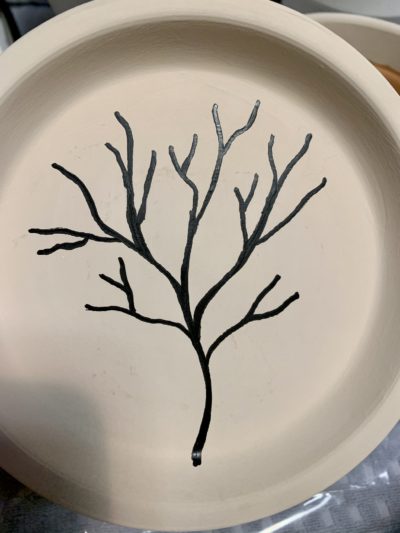
Then, I used light yellow, light orange, and light red acrylic paint to lightly stipple dots all over the trees and branches, to create an autumnal “Fall Leaf” effect (see below).
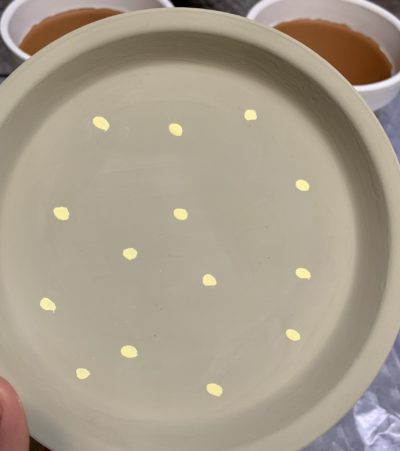
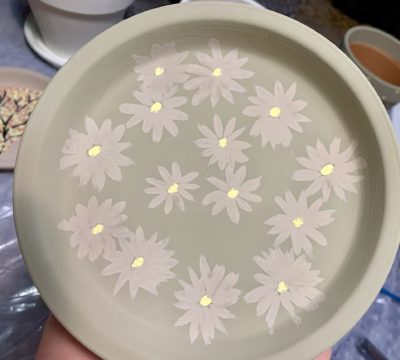
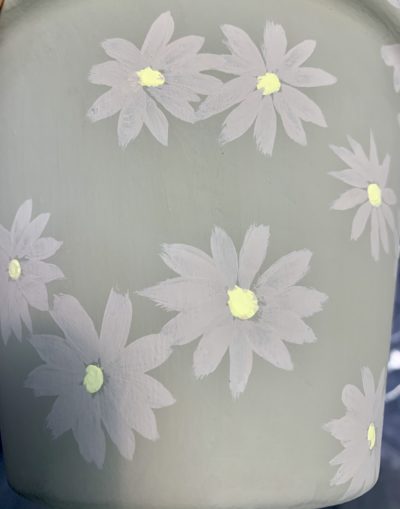
As my taupe clay pot was drying, I turned my attention to my sage green clay pot and saucer. For this pot, I decided to go with an abstract floral design. I used the light yellow acrylic paint and delicately painted little dots all over the body of the clay pot as well as the corresponding saucer. These light yellow dots would eventually serve as the center ‘seed’ portion of the flower. I allowed the light yellow dots to dry (which took about a half hour), before I began work on the petals.
For the petals, I used the same taupe acrylic color as I had previously used to paint the body of one of my large clay pots (I still had plenty left over in my plastic container). I began on the small corresponding saucer and allowed the design to feel very organic. I wasn’t worried about counting every single petal or making it seem uniform or too ‘perfect.’
The petal design was repeated once again all over the body of the clay pot…some flowers are connected together, because they are closer together, and others are farther away. Again, the entire design feels random, and very natural and organic.
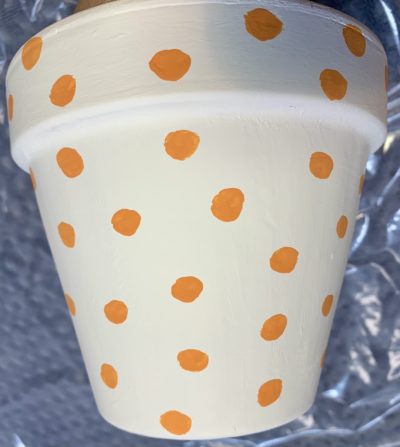
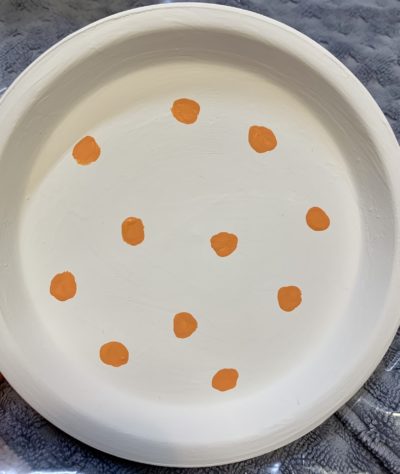
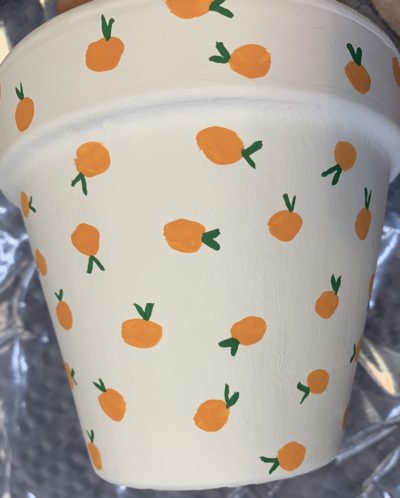
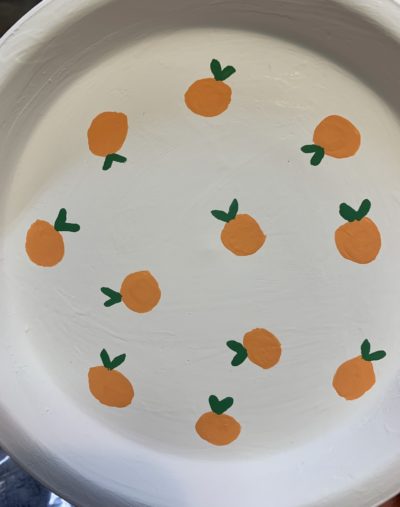
As my sage green clay pot was drying, I focused on my white clay pot and saucer. For this pot, I decided to go with an abstract pumpkin design. I used light orange acrylic paint to delicately paint oval dots (the pumpkins) all over the body of the clay pot as well as the corresponding saucer. I allowed the light orange dots to dry (which took about a half hour), before I began work on the pumpkin leaves.
For the pumpkin leaves…I used an acrylic green paint called ‘Holly Branch’ mixed with white acrylic paint, to achieve a slightly lighter green shade. I carefully painted a thin green “V” shape randomly on each pumpkin, to give the illusion that the pumpkins were scattered or ‘tumbling’ across the clay pot and saucer. As with the taupe petals on my sage green clay pot, this pumpkin design felt natural and organic.
Additional ideas for repurposing your (painted) terra cotta clay pots:

More ideas and inspirations (website links):
- 35 Super Creative Painted Flower Pots for 2021 (Ideas for Painting Your Terra Cotta Pot)
- 30 Gorgeous Ways to Decorate With Your Terra Cotta Pots
- 25 Amazing Things To Do With Terra Cotta Pots (Other Than Planting)
- 25 Unique Decorative Terra Cotta Clay Pot Crafts
- For more inspiring crafting ideas, please visit CCPL’s newest free crafting database, Creativebug
You can also check out our CCPL catalog for more information on fall gardening and craft projects such as:
- Perfect Pots for Small Spaces: 20 Creative Container Gardening Projects by George Carter
- Complete Container Herb Gardening: Design and Grow Beautiful, Bountiful Herb-Filled Pots by Sue Goetz
- Crafts to Make in the Fall by Kathy Ross
- Pumpkin Chic: Decorating with Pumpkins and Gourds by Mary Caldwell
Image credits: Unless otherwise noted and linked, all images were shot during the making of this blog.


